I spent the day yesterday with the "other man" in my life...the oh so fabulous t!m Holtz! He was at my lss, Ruban Rouge, for classes before he heads to Orlando this morning for CHA. I was lucky enough this time to take both classes he offered. When he was here 2 years ago, I was only able to take 2 of the 4 classes he offered. So I'm on t!m overload this morning..not that that's a bad thing! My fingers are still inky and Glossy Accent'd, but it's kinda like my badge of honor. It will come off. Eventually. But until then, I'll wear it proudly! (And yes, I know the shampoo trick, but I don't want to lose the inky fingers just yet!
When I saw Tami's sketch at http://www.cardpositioningsystems.blogspot.com/ I knew I'd have to use a couple of the techniques t!m taught us yesterday. Did you know you can run Grungeboard thru your Cuttlebug???!!! You can! Set it up just like you would to use the embossing folders if you were using cardstock to make a card with and run your piece of Grungeboard thru. It may give you a bit of resistance since the Grungeboard is thicker than cardstock so be gentle on the handle turning. Then ink your object, let it dry, sand it and the "high" spots will sand off. Then apply a different, contrasting color on the high spots and immedietly spritz water on a paper towel (not ON the grungeboard) and wipe. Your object will turn a whole new color! Totally rockin! AND you can also use embossing powder on Grungeboard. If you use Ranger Distress Ink, you have a 10 minute open window, otherwise, you will have to use an embossing ink pad once you've inked your object with some other ink. Pour clear embossing powder over your image and dump the excess back. Give the back of the image a good flick with your finger to make sure most of the powder is out of the crevaces. Then use your heat tool as normal. The high spots will be embossed and glossy. Such a cool technique!
I've got lots more tips to share over the next few days, plus pictures of all the creations I made. Five pieces of jewelry, or as t!m calls it, Wearable Art, plus Patchwork Pandemonium, all Grungeboard, all different, all unique, all VERY cool!
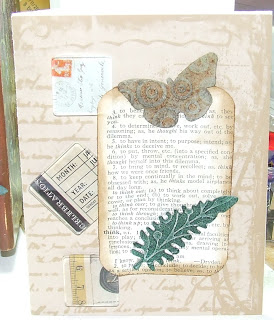
The leaf and the butterfly are both Grungeboard. The butterfly uses the first technique I described above and the butterfly uses the second. The squares on the left are all Fragments. I also used CTMH Notebook pp and a piece of a page out of an old dictionary.


6 comments:
i know I emailed you but wanted to post too. I love this card and the techniques.
Jealous of the classes you were able to take! I know you enjoyed them! Great card and very clever use of that CPS sketch.
I love the look you have given your card. To me, it is an old vintage look. Great job!
wow I love Tim holtz.. isnt he fabulous?
Great card... i love the techniques you used
WOW! I would love to take a class with Tim Holtz! He is amazing! And so is your card. I love how it turned out! Thanks for sharing your techniques!
Love the different elements you used for the circles. Wonderul job with the CPS sketch.
It's a good life!
Terri E.
Post a Comment