Getting ready for Halloween. I had some Hooligans paper pack left and I'm loving all the banners I'm seeing all over the Internets, so I decided to do a few of my own. Course John had to help me figure out how to cut the angles! I still have to have him help me when I need to add higher than 1 + 1! Anyway! The paper pack, as I said is Hooligans. The monster guy is an add-on to the Hooligans paper pack and he is felt. Most all of the other schtuff is from Michael's. The black gummy cat, Akiko-san, John's Japanese cousin sent me last year and I just found a use for it! I did add the googlie eyes to it. There's Stickles on the letters and on some of the other schtuff. Now I need to go put my Halloween stuff out so I can add the banner to it.
Thursday, September 30, 2010
Sunday, September 26, 2010
Mornin' Glory
Sarah at http://fortyfivedegrees.blogspot.com posted a wonderful sounding recipe for Morning Glory muffins the other day. I'd never heard of them, but we love everything that's in them, so I decided to try them. OMG! Such deliciousness you've never tasted! I'm usually a "warm it up and slather some buttah on it" muffin girl, but I've been eating these as-is at room temp and they are wonderful.
Morning Glory Muffins
2 eggs
3/4 cup oil
1/4 cup milk
2 tsps vanilla
2 cups all purpose flour
1 cup packed brown sugar
2 tsps baking soda
2 tsps cinnamon
1 1/2 cups shredded carrots
1 cup shredded apples (Sarah and I both left the peels on)
1/4 cup coconut
1/2 cup raisins
3/4 cup sliced almonds (like a good Southern girl, I used chopped pecans!)
Preheat oven to 350. Line muffin tins with cups or spray lightly with Pam.
In a large bowl, combine eggs, oil, milk and vanilla together til well mixed. Add flour, brown sugar, baking soda, and cinnamon and combine well. Batter will be on the stiff side, but no worries! Stir in carrots, apples, coconut, raisins and 1/2 cup of nuts. Mix well.
Divide the batter evenly into the muffin tins. Sprinkle remaining nuts on top. (Sarah and I mixed them all into the batter and skipped this step. I might do this if I were serving these to guests, but for us to nosh on...notsomuch!!)
Bake 20-25 min or til a toothpick inserted comes out clean.
Enjoy!
A couple of notes:
I like to put any raisins that I'll be using in a recipe in a small pot of water and bring to a boil, then reduce the heat and simmer for 5-10 minutes to plump them up. I think they taste better in baked goods when I do this. This recipe made 23 muffins for me. I filled my tins 3/4 full.
Friday, September 24, 2010
Triple Play
One thing I did make while healing that I can share is the Sept CTMH Promo called Triple Play. You get three mini-albums, die cuts to stamp and a stamp set in this promo. Once I finally figured out how to put the first one together, the other two went very quickly. The finished size is 3 x 3, so this would make a great mini album to put a few pics in to share at work or it would also make great Christmas gifts for a hair and nail gal!! Good thing they don't read my blog, huh?! All three are shown closed in the first pic. The colors are Sunset, Indian Corn Blue and Hollyhock. 'Scuse the finger in a couple of the pics! Silly page wouldn't lay down since I just put it together before I took the pic. I also added some round velcro to the front tab and back cover so it would stay closed and not flop open.
Thursday, September 23, 2010
Oh hi!
Jeanne emailed me this morning checking on me. I didn't realize it had been 10 days since I posted. Time kinda got away from me!
I am today 2 weeks post-op from the second bone replacement surgery. This one (thankfully) looks like it will be less involved than the first. I just got back from having the stitches removed. I have some sensitivity on the second to the back molar on the right side, which is the SAME molar that gave me so much grief on the left side last year. He seems to think this will "heal itself" once the bone starts growing. The sensitivity on this one is to cold and it's heat sensitivity that usually requires a root canal. So this impatient patient will just have to learn some patients while the new bone grows!
I've been working on Christmas gifts while I've been healing, so I have no art to show you.
John and I spent the last two days in the yard doing the flower bed cleaning. Such a job, but it looks so good once it's done.
Other than that, it's the same old at Casa de Waters! And thanks again Jeanne for checking on me!
Monday, September 13, 2010
Suite Layouts!
I decided to take my play on words and use it for my title page! Working on scrapping the pics of the Rays-Orioles game that we went to in Aug and sat in the Pepsi Suite. Using some old Scenic Route chipboard alphas that I re-covered in CTMH You Rock pp. Also used some long discontinuedCTMH sticky-back Twill to make a "blue jean" backer for the title by using various shades of blue and layering one on top of the other and also to make the baseball, which I used some Bamboo ink to dirty the ball. I used my long-reach Crop-A-Dile to attach eyelets and Waxy Flax to "tie" the two papers together. It took my three hours to do this one layout! That may be record for length of time!
Saturday, September 11, 2010
Evan
This is our friend Evan. Who I used to have to call my CTMH sister Debbie's son, Evan so John would know who I was talking about. Now it's just Evan. When I say Debbie, John asks, Who? So I tell him, you know, Evan's MOM!!!
This was the graduation picture, graduation announcement and Thank You card we recieved from Evan. Now that I've finally gotten vacay pics done, I could move on! And this layout proves that you CAN use flowered papers on a boy layout so long as you do it with a light hand. I used the pop of red since his school colors are red and black. I thought the now retired Silhouette papers would be perfect. I also found some old MM black and white buttons and used them up on the layout.
Friday, September 10, 2010
Pileated Woodpecker
This big guy is having a field day eating the red "berries' from the magnolia tree blooms. He was making such a racket I had to go get the camera and take a few shots. Pileated woodpeckers are in decline because of loss of habitat. They are about 4 times the size of a standard red-headed woodpecker. We have at least two pair that hang out around our house.
Sunday, September 5, 2010
The End
This was probably the hardest part of our vacation. James G. Dunton was John's cousin who was killed in Vietnam in 1959. James was one of the first casualties, and thus, his name is on the very first panel. So many brave men had their names placed on this Wall after him. Too many.
And this is the last of the vacation layouts I'll be sharing.
Saturday, September 4, 2010
It's Magic
I have one thing to say. If you want to spice up your scrapbook pages, you owe it to yourself to buy the new Magic book! Every technique I try, I fall in love with. And I wonder why I didn't think of some of these ideas years ago! Talk about your light bulb moments!
This uses a simple 3 x 12 piece of cardstock that is scored and folded. Then you attach matching cs and papers and your pictures. Keep it closed with a simple ribbon. (And yes, I cut my page protector so you can open it!) And you've got 5 more pictures on a page than you would have ordinarily! I also made another Pinwheel like on the CardPatterns post as an element on the page.
Thursday, September 2, 2010
Pinwheel
Another great sketch at http://www.cardpatterns.com/ this week! I saw a new technique the other day and wanted to try it. This is called a Pinwheel. I used the new CTMH Olivia paper pack, along with The Present and Timeless stamp sets. There is some Smooch Accent Ink on the flower which is also pop-dotted. Brads are CTMH Designer Brads.
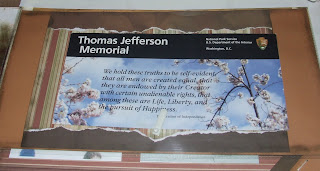
Jefferson Memorial
This is gonna go down as another all-time favorite layout. The more I use the new larger Flip Flaps, the more I love them. Makes the pages so much more cohesive when all of the pictures are on the same page. At least that's what I think!
We bought a copy of the Declaration of Independence while we were in DC, so that is what I used for the mat on the main pages. Most of it is behind the statue of Mr. Jefferson and the signatures are behind the two pics of me.
I found some more buttons in my stash, so they too have been incorporated. This uses the layout Magic Act from the new CTMH Magic book that is available for purchase TODAY! And yes, the stitching is real!
Wednesday, September 1, 2010
Xcellent!
This layout is of the different pics John took when he went on his "Xcellent Adventure" while I was Conventioning. I found some old chipboard buttons and re-covered them in Passages scraps to match and am using up yet more of my hoarded stash! I know. Big shock! There's also some CTMH designer brads.
Subscribe to:
Posts (Atom)